 Sigma
Sigma
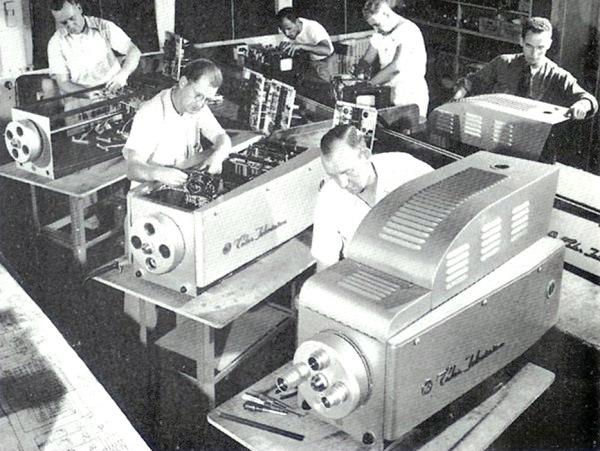
In my broadcast history article, I discussed the first generation of computer‐controlled cameras. These cameras appeared just before 1980.
![]() The first generation featured an 8‐bit microprocessor in the setup panel. It could automatically set up the cameras. The next generation had two microprocessors in each camera, and each camera knew how to set itself up. The setup panel simply told the cameras to set themselves up.
The first generation featured an 8‐bit microprocessor in the setup panel. It could automatically set up the cameras. The next generation had two microprocessors in each camera, and each camera knew how to set itself up. The setup panel simply told the cameras to set themselves up.

Until the 90s, cameras had "imaging tubes," despite using microprocessors and many large‐scale ICs. These in essence were very specialized and expensive vacuum tubes. At one end was a photo-cathode that would emit electrons where it saw lite. The more light the more electrons.
I was a fairly new employee at a Scripps station, WEWS in Cleveland. I worked as a technician in the engineering department. I repaired many types of equipment found at a station. The station had just bought new second generation computerized studio cameras. Now at the time, mid‐80s, the station was running cameras from RCA that were introduced in the late 60s. It was a widely used camera. Being that it was RCA, NBC used it extensively. It was the same camera that I stood behind in my early career. Now I was fixing them.
At that time, two video operators were nearing retirement. They set up and adjusted levels during shows. However, they refused to learn the new cameras. In reality it took much more skill and knowledge to set up the old ones than these new ones. The issue was that the new procedures seemed very strange to the operators who were about to retire. So, the cameras sat unused in the corner of one of the studios for those few weeks.
Most engineering departments let technicians specialize as much as possible. At that time, the station had around 200 employees. The engineering department included about 40 staff members. That included operators, management, and eight repair technicians. One tech specialized on the station's transmitter, about 20 miles south of the station. One concentrated on all things audio. A couple on VTRs, and a couple more on supporting the eqyuipment that the news department used. Now in a pinch every tech was expected to tackle a problem if the usual folks that covered that equipment were not available. It turns out that no one specialized in the studio cameras, both the ones being replaced, and all stayed clear of the new-fangled ones huddled off by themselves.
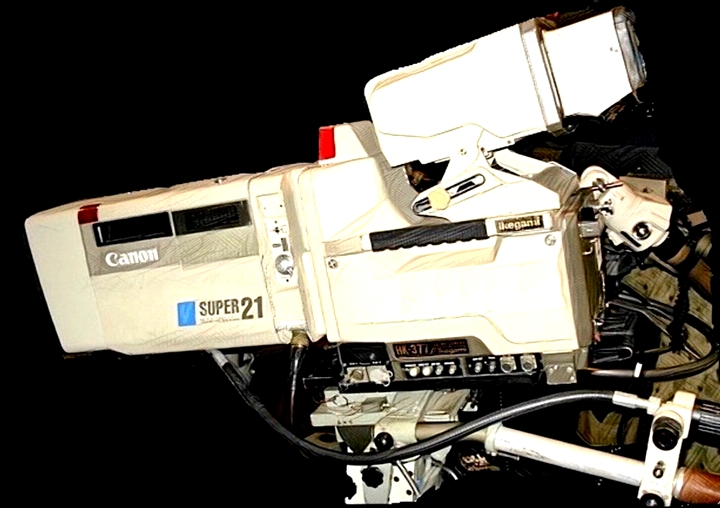
The new cameras were high-end ones from Ikegami (as seen on the left). At one time, Ike (pronounced Icky), as it was known in the vernacular, was one of the largest suppliers of television cameras. But Ike had a reputation at the time of providing little in the way of operational instructions. In fact, the manual devoted only the first two pages to camera setup and operation. The rest were schematics and parts lists. Most equipment today, even those that are fairly sophisticated, no longer includes schematics.
You could tell from a schematic what would happen if you flipped a certain switch, or why a lamp was on. That all changed with the introduction of microprocessors, software, and firmware. Some advanced gear have troubleshooting modes that help check if all input switches and knobs are working. These modes also ensure that all console lights are functioning.
But back to the new cameras that were being ignored in the corner. With my camera experience, I decided to use my spare time to learn how to set up the cameras and make them match. Matching is the process of making multiple cameras look identical in color rendition. Using a waveform monitor and a vectorscope (these tools are quite different today), and a little bit of subjective art, you would make all the cameras look identical.
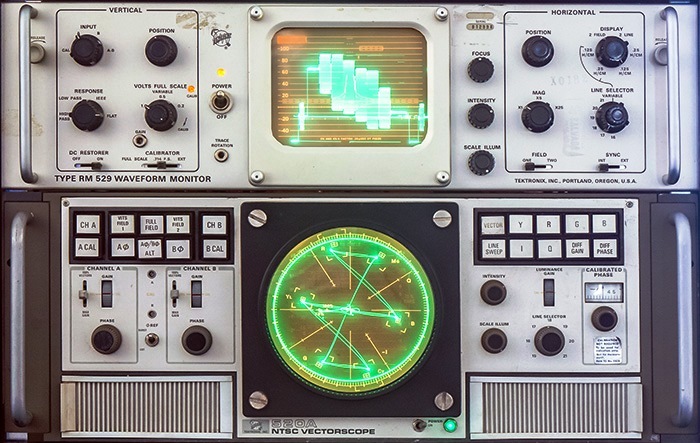
Waveform monitor (for video levels) and vectorscope (color phasing) from the day.
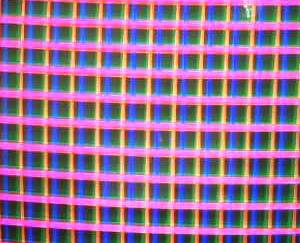
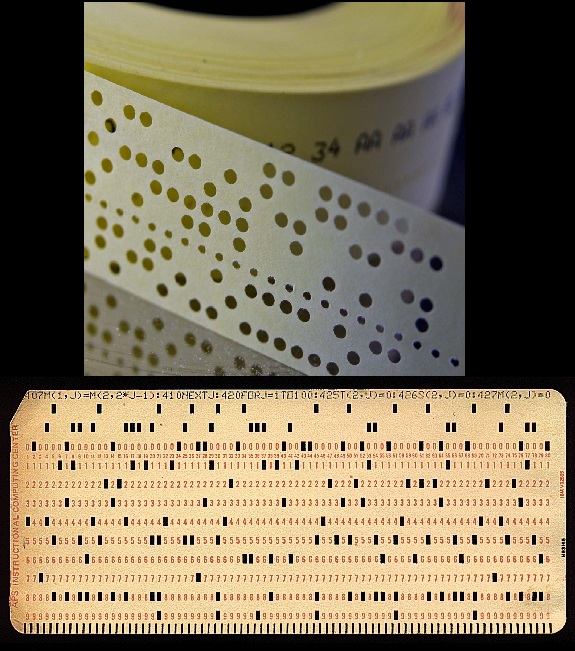
I discussed a first-generation microprocessor-based camera in my Anka Confusion section. All high-end computer cameras have an extender position in the lens for auto setup. This extender position includes a small test chart image. You can use it for automatic camera setup. You can see the chart for that camera at the top of this article.
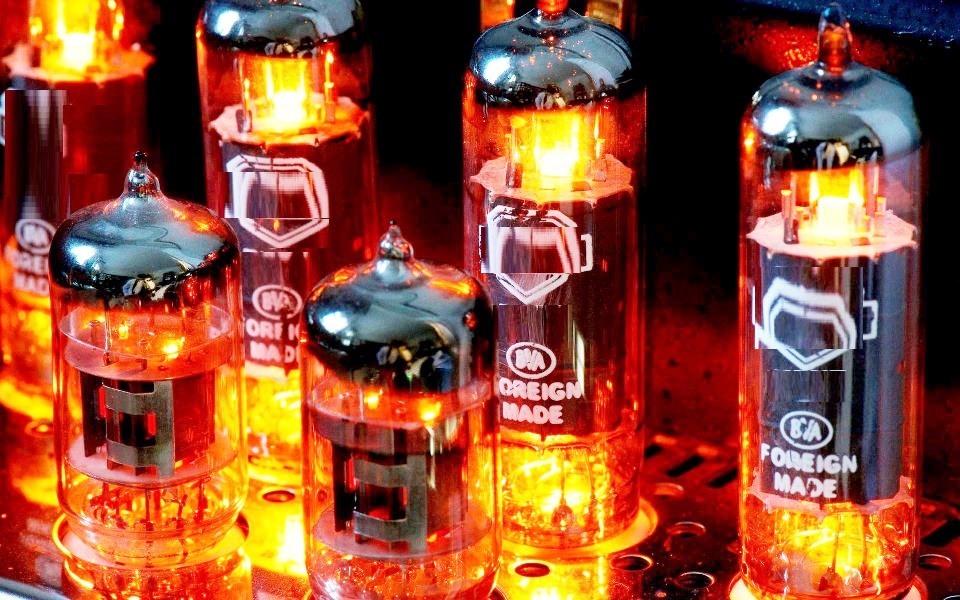
Early cameras required daily setup, unlike today's cameras that need little attention. Some facilities set them up every shift change. Why? The early ones had vacuum tubes. Vacuum tubes have a limited lifespan. Their attributes and features decline over time. Even with solid-state circuits, color cameras used three tubes for many years. This included the cameras I was schooling myself on. These three tubes were the imaging tubes.
These three imaging tubes looked through a prism at light entering through a prism. One imager saw mostly red light. Another saw mostly green. The third saw mostly blue. The three imagers each sat inside a magnetic deflection yoke. These yokes make the scanning electron beam move up and down and side to side. This creates the fields of video.
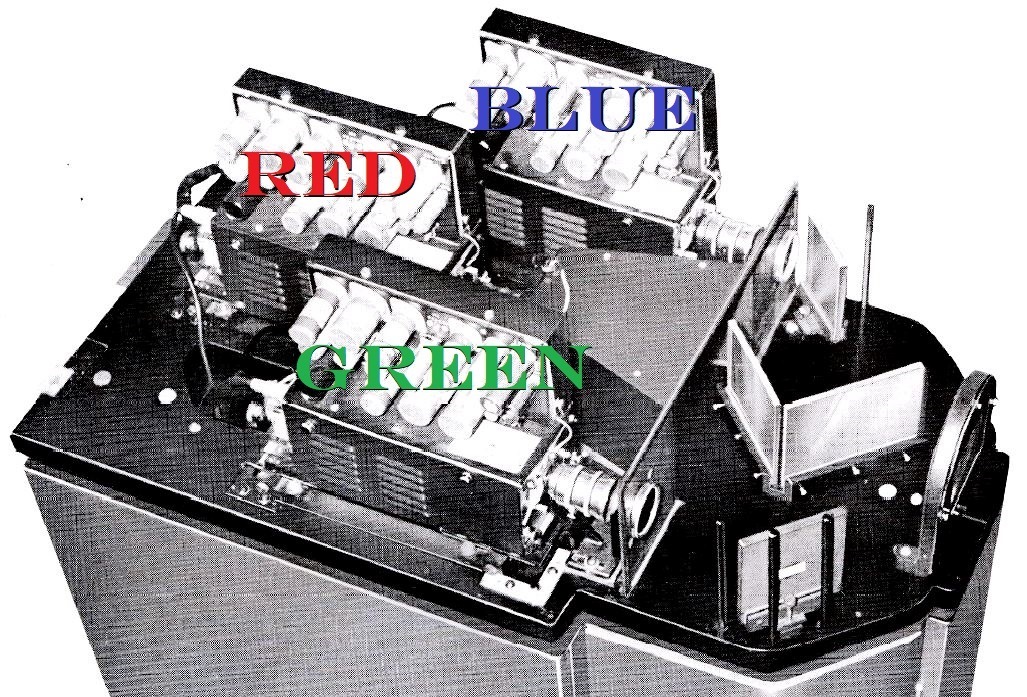

One goal in setup is to make these three separate video images line up exactly over each other. They called this registration. The fancy explanation is that we needed to adjust each tubes "geometry" so that all parts of the picture lined up color imaging wise. Early cameras could have a few dozen knobs to tweak registration in various areas of the image. Now this camera had the ability to make 28 tweaks to the signal horizontally and vertically. Thankfully, something that wasn't required of humans. The camera would do it itself.
The camera did a much better job on all geometry settings than humans could. There were only a couple adjustments that it usually was a bit off on. One was to handle light flare in the lens as the iris was opened wide. The other was the imaging tubes scanning beam. You wanted enough beam current to handle image areas of high light, but not to much that the beam would widen, which would cut down on the cameras resolution. Also high beam would shorten the life of these $2K imagers. Yes that is in 80s dollars.
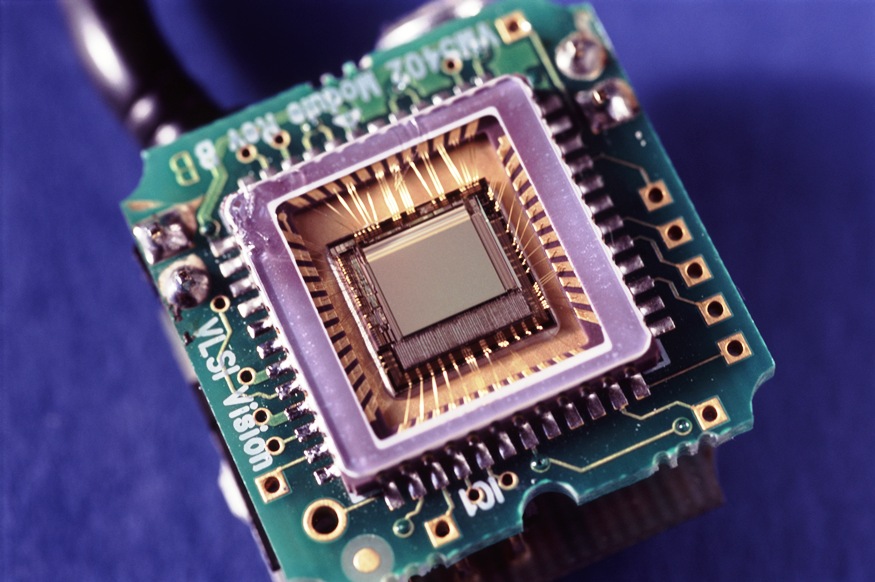
When CCD imagers arrived in cameras, the whole geometry game ceased. No beam currents, no beam scanning, Just pixels in the CCD that were fixed in place in the CCD. Plus, each CCD sensor was soldered to tabs on the prism. The whole optical block, as it became known, was one solid part.
The solid-state circuitry of this 80s camera was stable. Yet, registration issues still developed over time. Again, why? Main reasons were very small physical disturbances of the prism and imaging tubes yokes. Also, these tubes were like all tubes that came before. They had a limited lifespan. As they got older, their performance changed slowly.
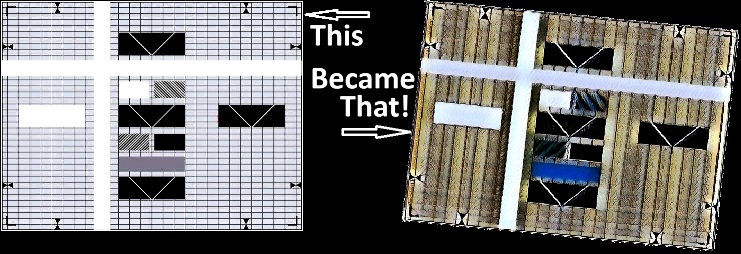
The automatic setup was much improved over the first generation microprocessor camera I had worked on. But something puzzled me for quite awhile. Over the first few weeks something was changing. Setup had two modes; you could use the internal test pattern, which was referred to as the diascope. The second used an external test pattern, which was identical to the internal one. But using this external one would exclude the need to white balance the camera after setup. To do this, I would do the external setup on the station's main news set. So the external chart had the same light as the set. In the external setup mode it would do the external setup, then compare the external to the internal, and any color and other level differences would be stored as offsets.
So this external setup would allow the cameras to go through a auto setup and not need white balancing. At least when looking at the news set. But that didn't last but a week or so. After auto setup with the internal test chart the cameras started to need white balancing again. Another external setup procedure, and another week or so of no white balance required after internal auto setup. At the time, the Ike support for this camera in the U.S. consisted of two people. Neither was of much help. In fact, I suspected they didn't even use the external setup procedure.
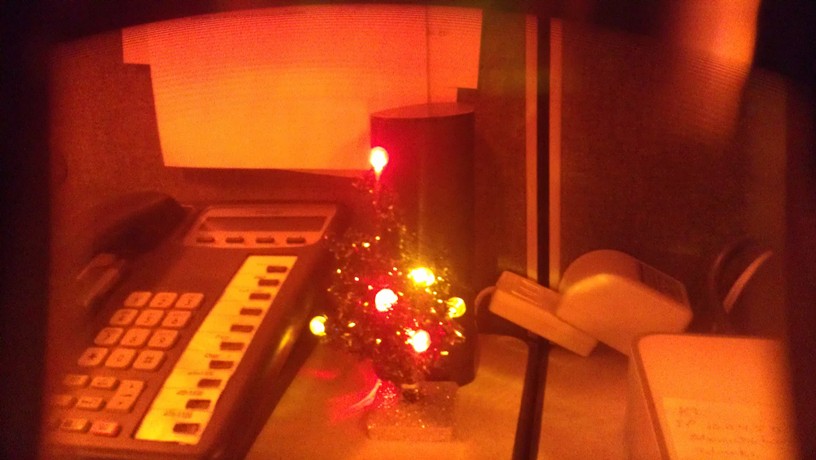
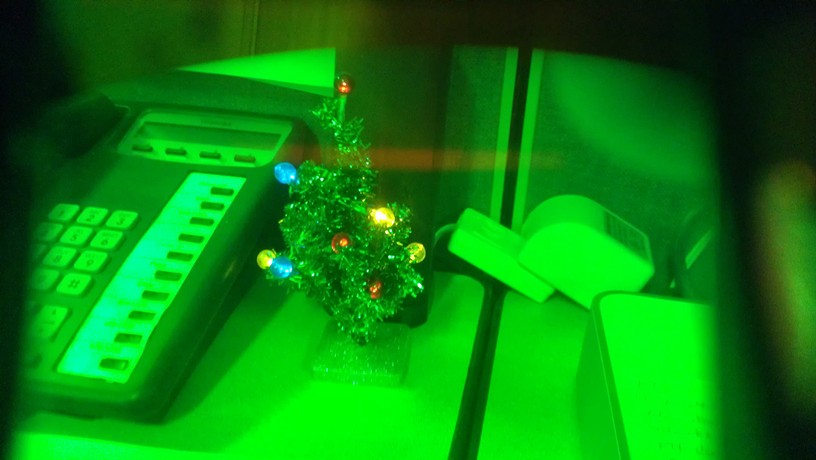
Then one day, I had an occasion to have to open up the zoom lens hung on the front of one of the cameras. I noticed that the end of the lens towards the camera had three adjustment pots. I noticed what turned out to be light pipes emanating from behind each pot. These headed towards the extender section that held the diascope test chart.
As mentioned earlier, Ike had nothing in the manual about these three adjustments. So as I was looking at the camera on a color monitor, I turned the pot labeled Red. The gray chart took on a red hue. It turned out that there were three incandescent light bulbs. Like tubes these bulbs also have a finite life, and they dim, not necessarily in sync, as they age.
Another adventure in reverse engineering the camera. The setup panel featured a set of buttons that looked like they could transfer setup files from one camera to another.
I can't remember what Ike support said, but I decided to transfer one camera's files to another. The camera receiving the files worked OK but produced video that needed auto setup. Some camera settings were so off that we had to adjust them manually to get them back where the auto setup could do its thing. More on this in a bit.
Months later, I finally discovered the real reason for transferring files. I came in one morning to find a camera that appeared to be on "crack." Indicator lamps were blinking, the lens shutter was chattering open and closed. Controls had no effect. The Ike support tech then came clean and said that the firmware for the microprocessor was in battery backed RAM. The battery had run low. It turns out that the battery low circuit, which would have produced a low indication on the control panel, had a very narrow voltage window. It wasn't noticed by any of the operators in time. The camera was turned off Sunday night. On power-up, it woke up useless. So transferring the files from a good camera cured the sick one.
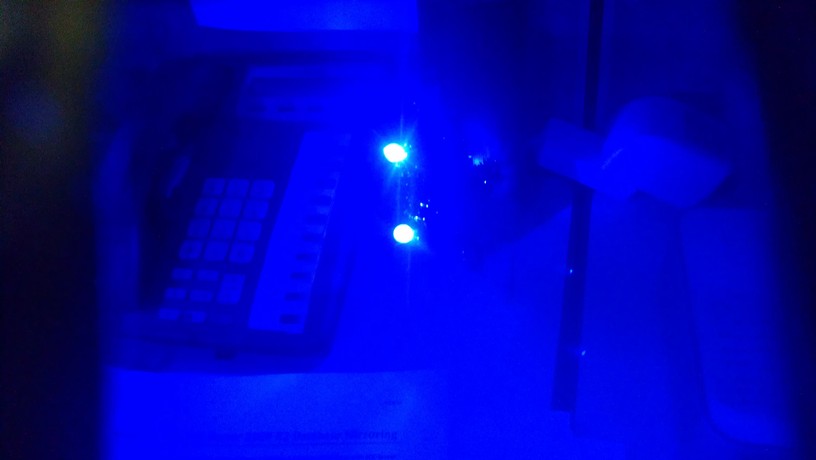
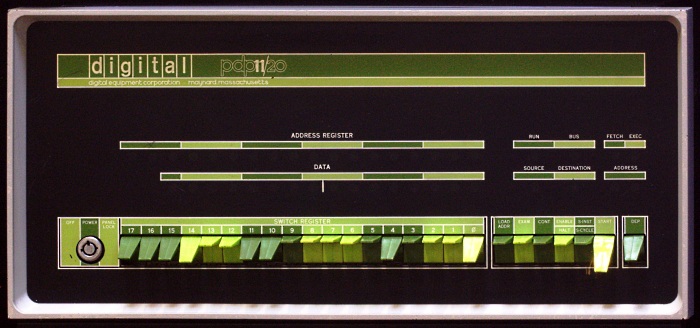
The final milestone in my journey with these cameras was the most frightening for me. At the top of this article the control panel on the right has a series of buttons highlighted. They started the setup in two ways. One method involved using the diascope test pattern in the lens. The other method used cameras looking at a real test chart.

I found out that if you push the buttons in the wrong order, the cameras enter the external setup mode. In this mode, they expect to see an external test chart instead of the usual internal one. I accentually found this out one day. What I thought would be a normal, uneventful, routine setup went horribly wrong.
The first thing the cameras did in auto setup were imaging tube adjustments. The first being tube electrical focus. Without that chart in place, the cameras would try to set themselves up at whatever they were looking at. After six failed setup steps, the focus was completely out of alignment, causing the setup to fail. This left you with all the cameras with useless video. I had four very costly "paper weights" on fancy studio pedestals.
Remember, Ike had no setup procedures. You would of have to had other camera experience to know what adjustment had to be made. The adrenalin was flowing then. You might wonder why, with today's technology, the cameras didn't revert to the last "good" setting if auto setup failed. That is exactly it. It was 80s technology. Eight-bit microprocessors, and more importantly, a lack of RAM. RAM was much more expensive and required much more real estate than today.
I think that what I, and others, stumbled on were a case of unintended consequences. Computer-controlled devices were in their infancy. I know a design people who aimed, as their career goal, to put microprocessors in everything back then. I remember the PCs started to show up in TV stations about the time these cameras did. They were used primarily in locations where typewriters had been placed. Offices, and in newsrooms. A couple of years later, they helped automate programming from master control. In the 90s, you often saw equipment that was really just a PC. It had plug-in cards to control devices. Some also featured basic video or audio cards for simple media processing.
In the 80s, mini-computers became popular. Some were smaller versions of mainframes, while others were workstations. Many of these devices appeared in television facilities for graphic work. These minis were also used to control video tape machines for editing. They were also employed for traffic systems.
![]()
Over the next couple of decades IT technology went from assist to total command and control devices, or more exactly systems.